Showing posts with label homemade yogurt. Show all posts

Friday, October 18, 2013

Nutella Yogurt Marble Cake!


Nutella Yogurt Marble Cake

Official Post № 9:

Right now you may be asking yourself, Why do you make everything with yogurt? Well, there's lots of reasons:
  • It tastes good.
  • It's healthy.
  • It tastes good.
Your next thought is likely along the lines of, "But yogurt and Nutella don't sound like they would taste that good together." And that's exactly what we thought when we first encountered the recipe

So there I was, perusing the interwebs (OK, so I was basically looking at fantastic food recipes on Pinterest making myself more and more hungry). I wasn't searching for yogurt recipes, but Nutella recipes. As fate would have it, one of the first recipes that came up was for some kind of yogurt Nutella cake. Sadly, the link was broken. Was I stumped? No! I had the entire internet at my fingertips! In just a few quick searches, I found out that there are many recipes out there for Nutella yogurt yogurt cakes, so it's not that strange after all! And for good reason too! As soon as you try out this recipe (which, in my humble opinion, is the best one out there :), you will understand why!

Here is what you will need:
  • 1 cup yogurt
  • 1/3 cup Nutella (may increase to 1/2 cup)
  • 3 eggs
  • 1/3 butter
  • 1 1/2 tsp vanilla extract
  • 1 1/2 cups flour
  • 1 cup sugar
  • 2 1/2 tsp baking powder
  • 3/4 tsp baking soda

Directions:

Preheat oven to 350° F. Grease an 8X8 glass baking dish or round cake pan. In a large mixing bowl, whisk together yogurt, eggs, and vanilla. Melt butter and whisk into mixture. In a separate bowl, combine flour, sugar, baking powder, and baking soda. Stir or whisk into yogurt mixture. Pour 1/2 to 2/3 of the batter into the greased cake pan. Stir Nutella into remaining batter. Pour the Nutella batter into the pan. Gently marble the two mixtures together. Bake for 40 minutes at 350°. Refrigerate leftovers (if any).

Expert tip: Microwave Nutella for a few seconds (10-12), but not too long. When it's just right it will easily slide right out of your measuring cup and mix in quickly.

Enjoy!


Whisk together all wet ingredients except for the Nutella!


In a separate bowl, mix dry ingredients.


Add dry ingredients to wet ingredients
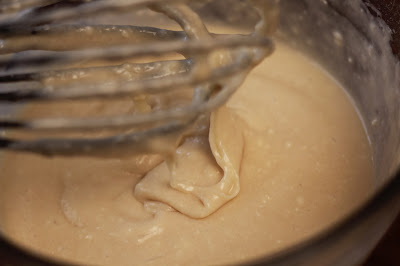

Pour 1/2 to 2/3 of mixture into prepared pan. Now get out the good stuff:


I would recommend microwaving briefly before combining with the remaining cake mixture. Pour on top of the batter in the pan.
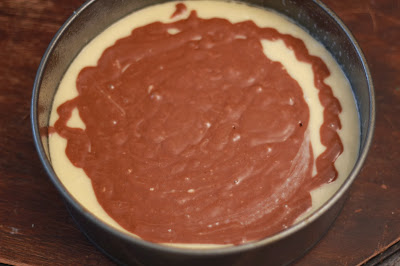

Marble the two mixtures together. A butter knife worked great!


You know what needs to be done with this :)


If anyone can enlighten me about this phenomenon, please do. Every time we have baked this, the Nutella mixture gathers while baking in the center, and in an outer ring:


The first time we baked it, it looked done after about 30 minutes, and even a toothpick test said it was done. But, alas it was not!

The cake turns out wonderfully moist. Awesome with ice cream:


Thanks for tuning in! Please let us know how the recipes turned out! Happy yogurting!

~Jeff & Mami

Did you miss the Peach Jam from a few weeks ago? Or maybe some refreshing Orange Drinkable Yogurt?

Still curious how to make your own yogurt? It's easy!


Friday, September 6, 2013

Peach Freezer Jam (quick & easy!)

Peach Freezer Jam
(quick and easy!)

Official Post № 8:

We hope all of you have had some good peaches lately, they're definitely getting in season! Back home in Brigham City, Utah, this weekend is the annual Peach Days celebration. It's a fun weekend celebrating the "abundance of the best peaches in Utah" that has been going on since 1904.

Some of you may be thinking that making jam is way too hard to make on your own, and that's what I thought until I tried it out! By the way, I made this one day without Mami's help, and I still can't believe nothing went horribly wrong! This is definitely the most complicated recipe we've posted yet, because it's not as simple as "throw stuff in a blender" or "mix this stuff together then throw it in the oven." But don't worry, it's still not very hard!

So, why peach jam on a yogurt blog? If you head on over and check out our Basic Flavoring post (one of our first!) from a few months ago, you will notice that adding a spoonful of jam to homemade yogurt is our favorite way to eat yogurt when fresh fruit is not handy, or when we're simply feeling lazy! :)


This is what you will need:

2 lbs peaches (about 3 cups finely chopped)
4 1/2 cups sugar
2 T lemon juice
1 packet Sure-Jell (NOT the sugar free kind)
3/4 cup water
Enough containers to hold 6 cups of fantastic peach jam.

Directions:

Skin and chop up peaches, then mix with lemon juice and sugar. Set aside for 10 minutes, stirring often to thoroughly dissolve the sugar. Whisk together water and Sure-Jell packet, bring to a rolling boil. Let boil 1 minute, stirring constantly. Add to peach/sugar mixture, and stir for 3 minutes constantly. Pour in prepared containers, leaving an inch at the top to freeze. Let sit at room temperature for 24 hours before freezing or refrigerating. Makes 6 cups.

Expert tip:
Prepare your containers before doing anything else. Wash them, dry them, open the lids... whatever you need. Once you get to that point, you're not going to want to wait to wash jars. No need for any fancy canning jars and lids for this one. We ended up using 2 mismatched jars, miscellaneous Tupperware, and a Ziploc bag.


After chopping peaches nice and small (this is the most time consuming part), mix with sugar and lemon juice. Stir it up well, and let sit for a few minutes while the sugar brings out a lot of juices from the peaches.


Now, set the peach and sugar mixture aside. Whisk together water and Sure-Jell packet. Bring to a boil, and let boil for 1 minute, stirring constantly. Add this mixture to the peach/sugar mixture and stir constantly for 3 minutes.

Pour into individual jars or freezer bags. If freezing, make sure to leave about an inch of space in each jar.


Now, if you can't wait to try some, it won't hurt to take a spoonful out and put it in some yogurt or on a slice of toast. And make sure to lick the bowl!

Let sit at room temperature for 24 hours, then refrigerate or freeze. Keep in refrigerator for 3-4 weeks.

Makes 6 cups of fantastic jam.


Thanks for tuning in! Please let us know how the recipes turned out! Happy yogurting!

~Jeff & Mami

Did you miss the delectable Blueberry Buckle from a couple weeks ago? Or maybe some refreshing Orange Drinkable Yogurt?
Still curious how to make your own yogurt? It's easy!

Tuesday, August 13, 2013

Blueberry Buckle (with yogurt of course!)


Blueberry Buckle
(with yogurt, of course!)

Official Post № 7:

Well, it's been a while, welcome back! A lot has happened since our last post, and it's been way too long!

The best news for us is that Mami has recently accepted a music therapy position! She's working for a number of different clients around the Bloomington, Indiana area, for both children and adults with developmental disabilities. She gets paid for about ten hours a week but spends around thirty hours total with all of her preparations and reports for each client. This is on top of working as a cake decorator. Yep, she's busy! We are both very excited that she is able to work as a music therapist again!

Since blueberries have been in season recently, we've been having many a good blueberry adventure recently with our yogurting. This is just one of the many that have turned out to be a success! Keep checking back and you'll find a recipe for a delicious Blueberry Yogurt Pie which Mami found on a Japanese website, which we think is originally from Sweden. We'll get back to you on that one!

Blueberry Buckle:

The cake turns out nice and moist, and the best part that there is no butter or oil in the cake itself (although there is butter in the crumbly topping). The original recipe called for a 1/2 cup of shortening.


Hungry yet? :)

Here's what you'll need:

For the cake:
  • 1/2 cup plain yogurt
  • 1/2 cup sugar
  • 1 egg, beaten
  • 2 cups flour
  • 2 1/2 t baking powder
  • 1/4 t salt
  • 1/2 cup milk
  • 2 cups fresh blueberries
For the topping:
  • 1/2 cup sugar (white or brown both work well)
  • 1/2 cup flour
  • 1/2 t cinnamon
  • 1/4 cup butter, cut into small pieces
Start preparing by heating your oven to 350 F. Also grease an 8X8 glass baking dish or round cake pan.

Fresh berries are obviously the best choice, but we aren't ashamed of using frozen berries when fresh berries aren't available, as is evident by our Blueberry Yogurt Muffin-top Cookies recipe.

Rinse your blueberries (if using fresh berries). Now, set the berries somewhere out of reach, or they will somehow disappear.


Cream yogurt and sugar. Add egg and mix well.


In a separate bowl, mix flour, baking powder and salt. Add dry mixture to creamed mixture, alternating with the 1/2 cup of milk.


We tried the next part two ways, and we enjoyed the second option much better. First we tried it with the all of the batter on the bottom, and all of the blueberries on top. On our second try we layered the cake with the blueberries, and we liked how it turned out this way better than all blueberries on top.

If you bake like I do, you will need to wash another cup of blueberries at this point. I'm really not sure how half of them disappeared before they made it in the cake! :)


Combine all topping ingredients until crumbly. White or brown sugar both work.


Sprinkle over top of cake mixture and bake at 350° F for 45-50 min. Use a toothpick test to make sure it's done in the center. If you have the patience to wait, let cool a little before devouring. It's great served warm or cool, with or without ice cream or whipped cream. Just eat it! :)

It won't be hard, but we recommend eating within a few days, and refrigerate after cooling. Enjoy!


That's it for now! Now we're off to Utah to visit family, it's going to be a great week!

Thanks for tuning in! Please let us know how the recipes turned out! Happy yogurting!

~Jeff & Mami

Did you miss the fantastic Yogurt Lover Mixed Berry Pancakes recipe or the Orange Drinkable Yogurt from a few weeks ago?
Still curious how to make your own yogurt? It's easy!

Tuesday, June 11, 2013

Orange Drinkable Yogurt


Orange Drinkable Yogurt
A wonderfully refreshing summer drink

Official Post № 6:

This recipe is a follow up recipe for our Yogurty Orange Julius that we posted a few weeks ago.

Back in 2006 and 2007 I was a missionary serving in Bulgaria. Bulgaria is a wonderful country full of fantastic people, beautiful scenery, a grand history, and delicious yogurt. One treat that I miss the most is what they call "кисело мляко за пиене" (kiselo mlyako za piene), directly translated as "sour milk for drinking", or, drinkable yogurt.

Strawberry, raspberry, and apricot were the standard three flavors of drinkable yogurt while I was there. Even though orange was not one of the standard flavors, it was too good, and too simple, to pass up.

But, who knew that it was going to be so simple to replicate? Just mix together some orange juice, plain yogurt, and a little sugar!


It turns out to be nice and thick and yogurty. This is what you'll need:
  • 1 cup yogurt
  • 1 cup orange juice
  • Sugar to taste (we used a couple spoonfuls)
Directions: Blend or whisk all ingredients.

A simple whisking worked well enough to not have to break out the blender. Or, one of those cool blender bottles also works well. Using Greek yogurt? Try a little more orange juice to yogurt ratio if it turns out too thick. Like it better with fresh orange instead of orange juice? Go for it! Tell us why and how in the comments.

Depending on how sweet you like your yogurts, you may not even need to add any to the yogurt and orange juice mixture. 

Plus, it's Mami approved!


Don't worry, we haven't gotten off of the orange juice & yogurt kick yet! In addition to our previous Yogurty Orange Julius post, we're working on an Orange-Banana Yogurt Slushy Smoothie, as well as Orange Frozen Yogurt/Sherbet - both have been tested by friends and proven to be delicious. All are fantastic and easy, and we will post the recipes here in the near future.

Thanks for tuning in! Please let us know how the recipes turned out!

~Jeff & Mami


Did you miss the fantastic Yogurt Lover Mixed Berry Pancakes recipe from a couple weeks ago?
Still curious how to make your own yogurt? It's easy!

Wednesday, May 29, 2013

Yogurt Lover Mixed Berry Pancakes


 Yogurt Lover Mixed Berry Pancakes
No butter, no oil!

Official Post № 5:

Over the past year or so, Mami and I have tried a number of pancake recipes that include yogurt. Most were decent. Some were, well, meh. But, just the other day we found a recipe that has made our top list! They turned out so well, that we've eaten them for four days in a row!

Ingredients:

  • 1/2 cup plain yogurt*
  • 1 1/2 cups flour
  • 1/4 cup sugar*
  • 1 1/2 t baking powder
  • 1/4 t baking soda
  • 1/4 t salt
  • 1 egg
  • 3/4 cup milk
  • 1 t vanilla
  • 1/2 cup or so fresh or frozen berries**

*You don't have to use plain yogurt for this recipe - you can add your favorite fruit-on-the-bottom yogurt instead. Depending on the sweetness of the yogurt you use, alter the amount of sugar in the recipe.
**We recommend blueberries, raspberries, or strawberries. The last couple times we used a combination of blueberries and raspberries.

Directions: Combine dry ingredients in a large mixing bowl. In a separate bowl, beat together the yogurt, egg, vanilla, and milk. Add the yogurt mixture to the dry ingredients. Right before frying gently fold in the berries. Fry like you would any other pancake. Eat. Enjoy! Be happy! Makes about 14-16 pancakes.

Expert tip: Add white chocolate chips! :)


Your batter should turn out about the consistency of the following picture. We used some really thick yogurt our first time around, and it turned out too thick. So, we added a couple tablespoons of milk at a time until the batter reached the desired consistency.


If you are using berries (they're also great berry-less!), add them right before you fry your pancakes, and only gently fold them into the batter. As with our recipe for our Blueberry Yogurt Muffin-top Cookies (check 'em out, they're super good!), we microwaved our frozen berries for a few seconds to allow the juices to seep out, which then color the batter. If you don't like it that way, just mix them in still frozen, or use fresh berries!


Gently fold in berries. Most of the purple streaks disappear as the pancakes are fried, but some coloration remains.


While visiting Mami's family in Japan last summer, we picked up a handful of these heart shaped silicon molds from a Japanese dollar store (well, actually a 100 yen store). They're meant for eggs, but work great for pancakes!


And, they turned out great!


The recipe posted above is a modified (and better!) version of a recipe from the Chobani website. Thanks to them for the idea!


Enjoy! Let us know how they turned out! Did you try anything different?

Thanks for checking it out!

~Jeff & Mami

Did you miss the fantastic Yogurty Orange Julius recipe from a couple weeks ago?
Still curious how to make yogurt? It's easy!

Monday, May 6, 2013

Basic Flavoring

Fresh blackberries
Fresh strawberries

Official Post № 2:

"Holy cow, I just made a half gallon of yogurt, now what?!?"

I'm sure this is the situation that many of you currently face. :) Rest assured, this is the best part! We will offer some suggestions below, but post us a comment with your favorite too!

Fresh Fruit

By far, this is our favorite way to eat our yogurt. Slice up your favorite fresh fruit, add a little sweetener (honey or sugar), add a few drops of vanilla, stir it up, and eat it!

The tried and true:

  • Strawberries (our favorite!)
  • Raspberries
  • Banana (easy and cheap)
  • Blackberries
  • Kiwi (this one was surprisingly fantastic!)
  • Apple (we will add a special recipe for this one later on)
  • Pear
  • Peach
  • Grapes
  • Pineapple (not our favorite...)
  • Blueberries

Frozen Fruit

When fresh fruit isn't handy, frozen fruit is a good substitute. Just thaw it out a little (zap it in the microwave for a few seconds or run it under hot water), add a little sugar and vanilla to taste.

Jam

No fresh or frozen fruit? Too lazy? Stir in a spoonful or so of jam, and add a couple drops of vanilla. Quick. Easy. Done.

Our homemade strawberry jam. Thanks for the recipe Mom!

Canned Fruit

Canned pears and peaches are our favorites of the canned varieties.

Our personal favorites

Out of all of the above, we do have a few favorites:
  • Fresh strawberries
  • Strawberry jam
  • Canned pear
 Sweetening

This part depends on how sweet you like your yogurt. Some like it unsweetened, just with fruit added. Others like it sweetened. Others like it really sweet. We like it slightly sweet.

Honey is probably the best sweetener, but we often go with just a little bit of sugar.

Vanilla is key

Don't forget the vanilla! Add a drop or two or three when you mix in your fruit. Viola! Delectable yogurt!


Future posts for simple flavorings:

Mock apple pie yogurt
Granola

Future blog posts (include, but not limited to):

Smoothies!

Strawberry yogurt pancakes

Strawberry yogurt banana bread

Lemon poppy seed yogurt muffins (the yogurt makes these so soft and moist!)
et cetera, et cetera, et cetera...

Thanks! Please share with us some of your favorite flavorings - I'm sure we've been missing out on some!

Wednesday, April 10, 2013

How to Make Yogurt - The Basics

yum!
Blackberry yogurt

Welcome to Yogurt Yogurt Yogurt! As you guessed, most posts are going to be centered on, well, yogurt!


The point of this blog is two-fold:
  • Show how easy it is to make your own yogurt, because most instructions out on the web make it sound tough!
  • Show off awesome ways to use yogurt in daily recipes. Using yogurt in cooking means tasty, healthy, and inexpensive!


Official Post № 1:
Yogurt Making Basics
  • Boil milk.
  • Add yogurt start.
  • Incubate.
  • Done!
That's it! OK, there are some specific temperatures, a need for a live bacteria, and certain durations. But, I try to keep it pretty simple so that I don't have to worry about all of that science-y stuff :)

You will need:

  • 2% Milk (I use 7 1/2 cups, but this will depend on how much you will make)
    • Other fat contents work as well. We'll talk about that at a different time.
  • Yogurt start
    • Plain yogurt with live bacteria. If you want a recommendation for a good start, I like Dannon Oikos plain Greek yogurt. It costs a little more than $1 for a small cup. Lets talk about different kinds of yogurt starts at another time.
  • About 30 minutes
    • Yes, I have it down to an art - milk boiled, cooled, start added, and dishes washed in under 30 minutes. I'm kind of proud of that one! :)
Kitchen items:
  • Yogurt maker (optional)
    • The yogurt maker helps, but all it does is keep a constant temperature. This can be done without one by wrapping a pot that contains your milk mixture with a blanket or two, then put it in the oven (don't turn it on!). Since ovens are insulated, this will keep its temperature fairly constant. A thermos will also work well because it is so well-insulated.
  • Pot for boiling
  • Tightly woven strainer
  • Plastic fork or whisk
  • Another small bowl

Instructions:
Boil milk: This gets rid of unwanted bacteria that can interfere with the good yogurt bacteria during the incubation process. It only needs to reach boiling (or close to it), and does not need to stay at that temperature.
Tips:

  • Scalded milk makes the yogurt taste scalded. Ewwww!
  • To avoid scalding my milk, I start warming it up in the microwave (10 minutes or so total), then I finish boiling on the stove.
  • While your milk is warming up, place a scoop of yogurt in a separate bowl. I use about 1 1/2 tablespoons. This lets the yogurt start warming up to about the same temperature that you will cool the milk to. 
  • If you have a yogurt machine, turn it on now to let it warm up.

7 1/2 cups of 2% milk

Our *awesome* stove, complete with "blender" buttons!
Cool milk: Cool the milk down to roughly room temperature.
Tips:

  • Prepare a cold water bath to cool your milk quickly. Fill your sink with cold tap water and float the pot with milk in it. This takes roughly 10 minutes, depending on how cold the water bath is.
  • Do the pinkie test - stick your pinkie in the milk once it is getting close to room temperature and count to 10. If you can count to 10, this means it is cool enough. Too hot of milk will kill the good yogurt bacteria that you are going to add. Too cold of milk will take a little longer to warm up and is not the end of the world.
  • Strain milk through (preferably plastic) strainer to get rid of any inconsistencies.


Add yogurt start: Boiling the milk killed unwanted bacteria. Now it's time to add good bacteria. There are different kinds, and all make good yogurt.
Tips:

  • I use about 1 1/2 tablespoons. Slowly whisk your cooled milk into the yogurt start until you have added a cup or so (a plastic fork works great - they say that metal isn't very good for the yogurt bacteria). Pour this mixture into the rest of your cooled milk and gently stir.
That's about a tablespoon and a half of yogurt start
Incubate: An actual yogurt maker keeps this part nice and simple. All this does is keep your to-be yogurt at a constant temperature
Tips:

  • For the last couple years we have been incubating our yogurt for 8 hours and 15 minutes. This is something that can be changed depending on how thick or tart you want your yogurt.

Our magic number: 8 hours, 15 minutes.
Refrigerate: I'm not a big fan of warm yogurt. I found this out the first time I made my own yogurt - I was way too excited to wait until it was cool! Cool your brand new yogurt until it's, well, cold, then eat it!

Before you eat all of it...
Make sure to save a spoonful of this yogurt for your next batch. Yogurt cultures can last a long time. Some sources say to get a new start every few cycles, but it's not necessary. I have been using my current start for the past 6 months!

But what now?
So what do I do with plain yogurt? This, my friend, is the main question that we will try and answer in as many ways as possible through this blog. My first recommendation is to toss in some fresh fruit, a little sugar, and a little vanilla. A spoonful of jam and a little vanilla also make a very easy sweet yogurt.

The following is a list of future posts. We will add links here as we post recipes.
  • Simple flavorings - Yogurt 'n fruit
  • Yogurty Orange Julius
  • Frozen yogurt
  • Cheese balls
  • Yogurt substitutes
  • Super healthy (and more importantly, tasty!) yogurt ranch dressing
  • Smoothies!
  • Greek yogurt
  • Lassi
  • Baking with yogurt
  • Muffins w/ yogurt
  • Strawberry banana yogurt cake
  • Pancakes
  • Soup
  • etc.
  • etc.
  • etc.

That's all folks! Please let me know what does and doesn't make sense. Also, feel free to send in ideas for future topics. Thanks!